


1. "Gray Haze" in Night Vision:
- Cause: Nearby obstructions, whether in the camera's field of view or not, or strong light sources, can cause infrared reflection back into the lens, resulting in a white, foggy image with a dim background.
- Solution:
1. During installation, ensure that there are no cables, brackets, posts, wires, or tree branches obstructing the lens.
2. Maintain a specific angle between the lens and walls, ceilings, or beams.
3. If the camera is near light sources like street lamps, floodlights, or illuminated signs, maintain a certain height difference to avoid strong light interference.
2. "Light Spots" in Night Vision:
- Cause: Strong ambient light or other infrared light sources causing optical phenomena can create significant "light spots" near the camera's lens.
- Solution: Avoid direct exposure to strong lights or infrared lights from other surveillance cameras.
3. Blurred Night Vision, Large "Snowflakes":
- Cause: In large or open environments with minimal reflective objects and low ambient lighting, night vision can become overall dim, blurry, with large "snowflakes" or noise.
- Solution:
1. Consider that night vision will be less effective in low-light and open environments and plan accordingly.
2. In demanding night vision scenarios, opt for cameras equipped with dual or quad infrared lights and determine the camera's coverage area effectively.
3. If possible, provide additional illumination to the monitoring scene, but avoid direct light into the lens.
4. Bright Spots and Long Trails in Night Vision:
- Cause: Night vision involves longer camera exposure times, making moving objects like insects and dust particles appear as bright spots or create trails. This effect is normal in night vision.
- Solution: Bright spots and trails are inherent to night vision and cannot be entirely eliminated. Use image enhancements for improved clarity.
5. Dark Night Vision:
- Cause: If the camera's angle is too close to a wall, strong infrared reflection from the wall may cause overexposure, resulting in a dark image on the opposite side.
- Solution:
1. Adjust the camera's installation angle to minimize the area exposed to overexposure, thus increasing the effective monitoring area.
2. Configure the camera's region compensation to extend exposure time in areas with potential overexposure.
3. Enhance low-light detail by adjusting the camera's Wide Dynamic Range settings.
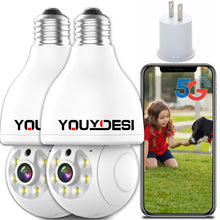
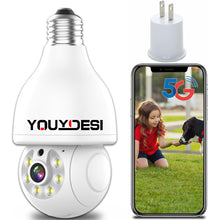
These solutions can help address issues related to night vision in surveillance cameras, whether used for indoor/outdoor home security or wireless camera setups, including light bulb cameras.
- Cause: Nearby obstructions, whether in the camera's field of view or not, or strong light sources, can cause infrared reflection back into the lens, resulting in a white, foggy image with a dim background.
- Solution:
1. During installation, ensure that there are no cables, brackets, posts, wires, or tree branches obstructing the lens.
2. Maintain a specific angle between the lens and walls, ceilings, or beams.
3. If the camera is near light sources like street lamps, floodlights, or illuminated signs, maintain a certain height difference to avoid strong light interference.
2. "Light Spots" in Night Vision:
- Cause: Strong ambient light or other infrared light sources causing optical phenomena can create significant "light spots" near the camera's lens.
- Solution: Avoid direct exposure to strong lights or infrared lights from other surveillance cameras.
3. Blurred Night Vision, Large "Snowflakes":
- Cause: In large or open environments with minimal reflective objects and low ambient lighting, night vision can become overall dim, blurry, with large "snowflakes" or noise.
- Solution:
1. Consider that night vision will be less effective in low-light and open environments and plan accordingly.
2. In demanding night vision scenarios, opt for cameras equipped with dual or quad infrared lights and determine the camera's coverage area effectively.
3. If possible, provide additional illumination to the monitoring scene, but avoid direct light into the lens.
4. Bright Spots and Long Trails in Night Vision:
- Cause: Night vision involves longer camera exposure times, making moving objects like insects and dust particles appear as bright spots or create trails. This effect is normal in night vision.
- Solution: Bright spots and trails are inherent to night vision and cannot be entirely eliminated. Use image enhancements for improved clarity.
5. Dark Night Vision:
- Cause: If the camera's angle is too close to a wall, strong infrared reflection from the wall may cause overexposure, resulting in a dark image on the opposite side.
- Solution:
1. Adjust the camera's installation angle to minimize the area exposed to overexposure, thus increasing the effective monitoring area.
2. Configure the camera's region compensation to extend exposure time in areas with potential overexposure.
3. Enhance low-light detail by adjusting the camera's Wide Dynamic Range settings.
These solutions can help address issues related to night vision in surveillance cameras, whether used for indoor/outdoor home security or wireless camera setups, including light bulb cameras.
